.svg)
.svg)

In the competitive employment market today, differentiation has never been so important. While a well-written resume and professionally formatted LinkedIn profile are still a requirement, video resumes are quickly becoming an important career tool. They offer an exciting, interactive way of showcasing your qualifications, personality, and professionalism — all without ever sitting across from an interviewer.
CapCut Desktop Editor makes this even easier with powerful tools like text to speech, enabling you to quickly create voiceovers if you prefer not to speak directly on camera while maintaining a professional presentation.If you're looking to make a great video resume that will leave a lasting impression, CapCut Desktop Editor is an excellent place to start. It's free, simple to use, and packed with features that enable you to produce high-quality, professional videos from the comfort of your computer. Here, we'll walk you through the entire process in five main steps, with some extra tips and tricks in between to help you create a resume video that best represents you.
Why Use a Video Resume?
Face it — employers are swamped with stacks of traditional resumes. A short, effective video resume allows you to get noticed immediately.
With a professionally made video, you can:
Emphasize your communication skills.
Showcase your personality and confidence.
Highlight your work through images (useful for industries involving creativity)
Give employers an idea of who you are beyond bullet points.
Additionally, it indicates initiative and technical knowledge, both traits most commonly sought by employers.
Emerging technologies, including AI video generator tools, can even help you create background visuals or themed settings for your video resume if you want to stand out visually without needing extensive design skills.
Step 1: Script Planning and Storyboarding
Before launching CapCut, it's essential to have a solid plan in place, especially when creating a video resume. Ideally, your video should be concise, keeping it under two minutes, and clearly structured for maximum impact.
Start with an introduction that includes your name, background, and a brief elevator pitch about who you are and what you do. Follow this with a section on your experience and skills, highlighting your key accomplishments and what makes you a strong candidate. If you work in design, tech, or any field that benefits from visual examples, include a short showcase of your portfolio or projects.
Conclude by recapping your career goals, thanking the viewer, and offering a call to action, such as how they can contact you. A helpful tip: write out your story and practice reading it aloud several times. Aim for a tone that feels natural and conversational, avoiding the stiffness of reading directly from a script.
Step 2: Recording Your Footage
Once your script is complete, it's time to start filming. You can use either a webcam or a smartphone, but be sure to record in a quiet, well-lit environment to ensure good audio and video quality. To make your video look more professional, consider a few simple tips: use natural light or a ring light for even lighting, position yourself so that your head and shoulders are clearly visible, and dress professionally in a way that suits your industry.
Remember to smile and look directly into the camera—confidence makes a strong impression. Don’t hesitate to record several takes and choose the best one to edit later using CapCut.
Step 3: Building Your Project on CapCut Desktop
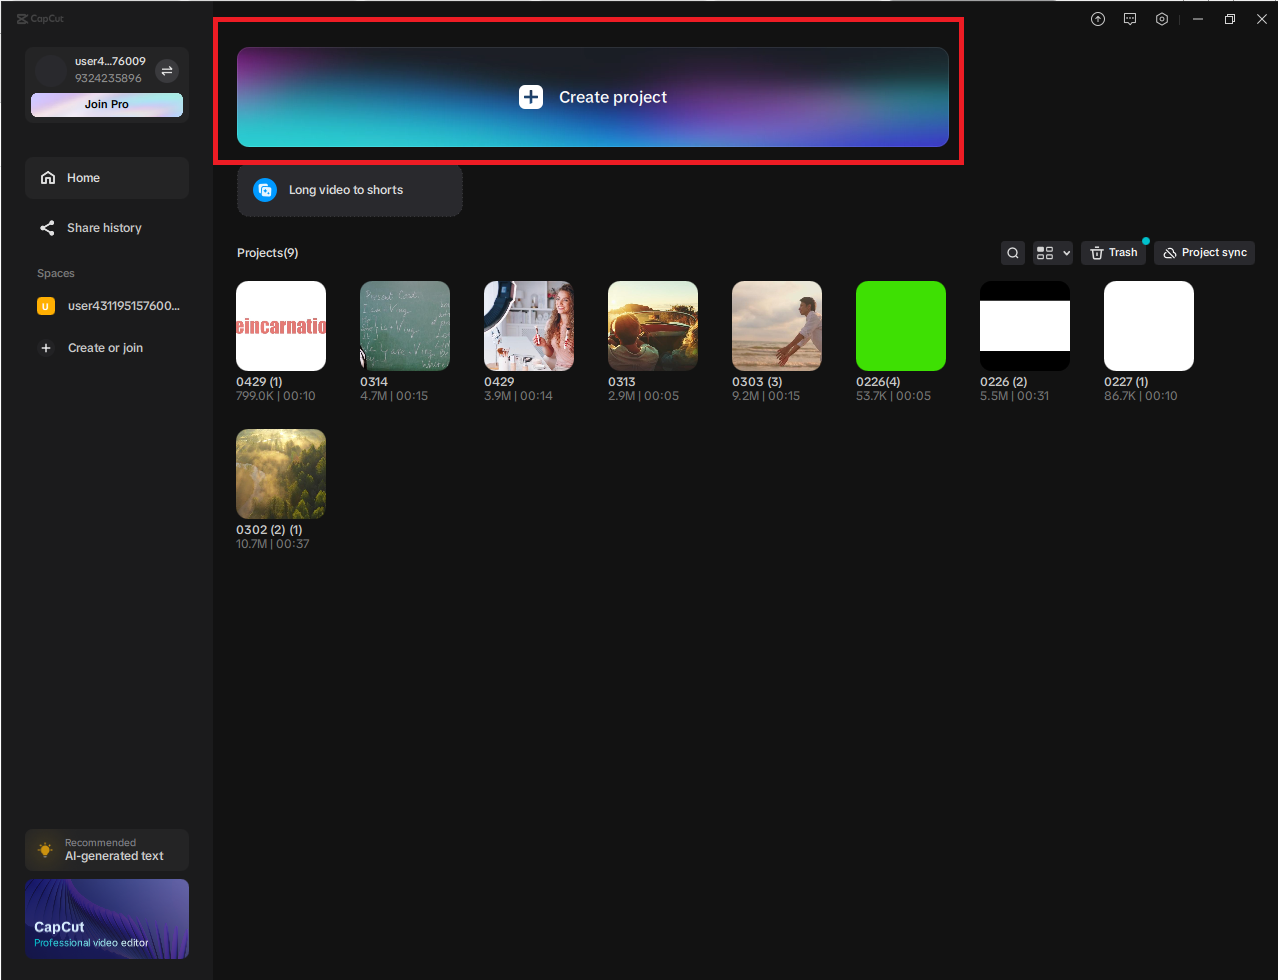
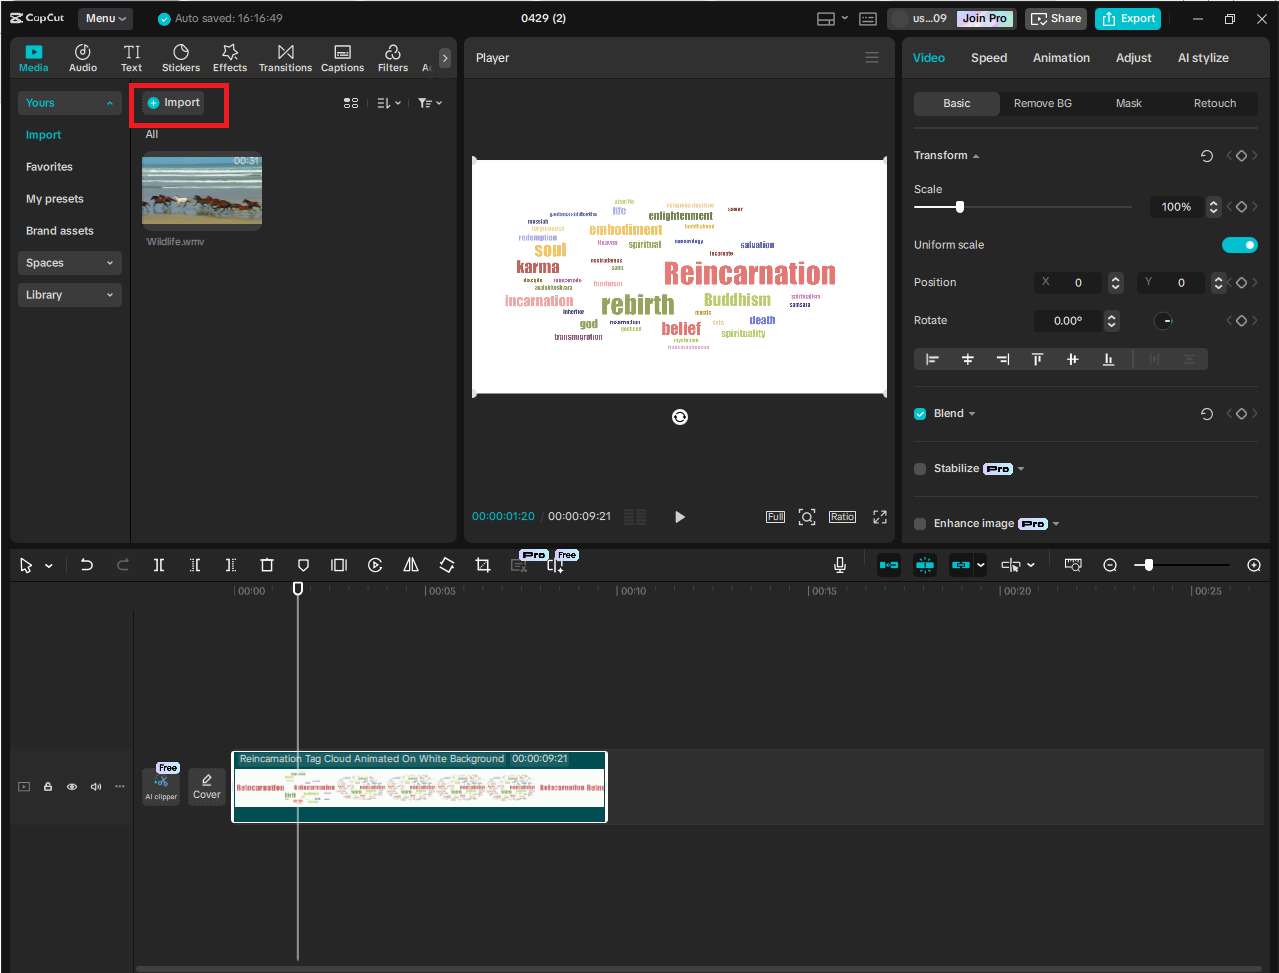
Now, real fun begins. Open CapCut Desktop and see these steps of operation to start working on your project: open CapCut and choose "New Project." Import your video content as well as other media you want to utilize (pictures of your work, certificates, logos, etc.).
Drag your key footage onto the timeline. Cut the start and end to eliminate awkward stops or setup time. CapCut's timeline also makes it simple to cut clips in half, trim unwanted video, and tidy up so it's smooth.
CapCut’s advanced editing tools even allow for voice changer effects, which can subtly adjust your voice tone if you need to sound a bit more formal, energetic, or dynamic, depending on the target job role.
Step 4: Adding text, music, and transitions
This is where your video resume really shines. CapCut Desktop Video Editor provides a range of features that help make your video professional and engaging without being overly flashy.
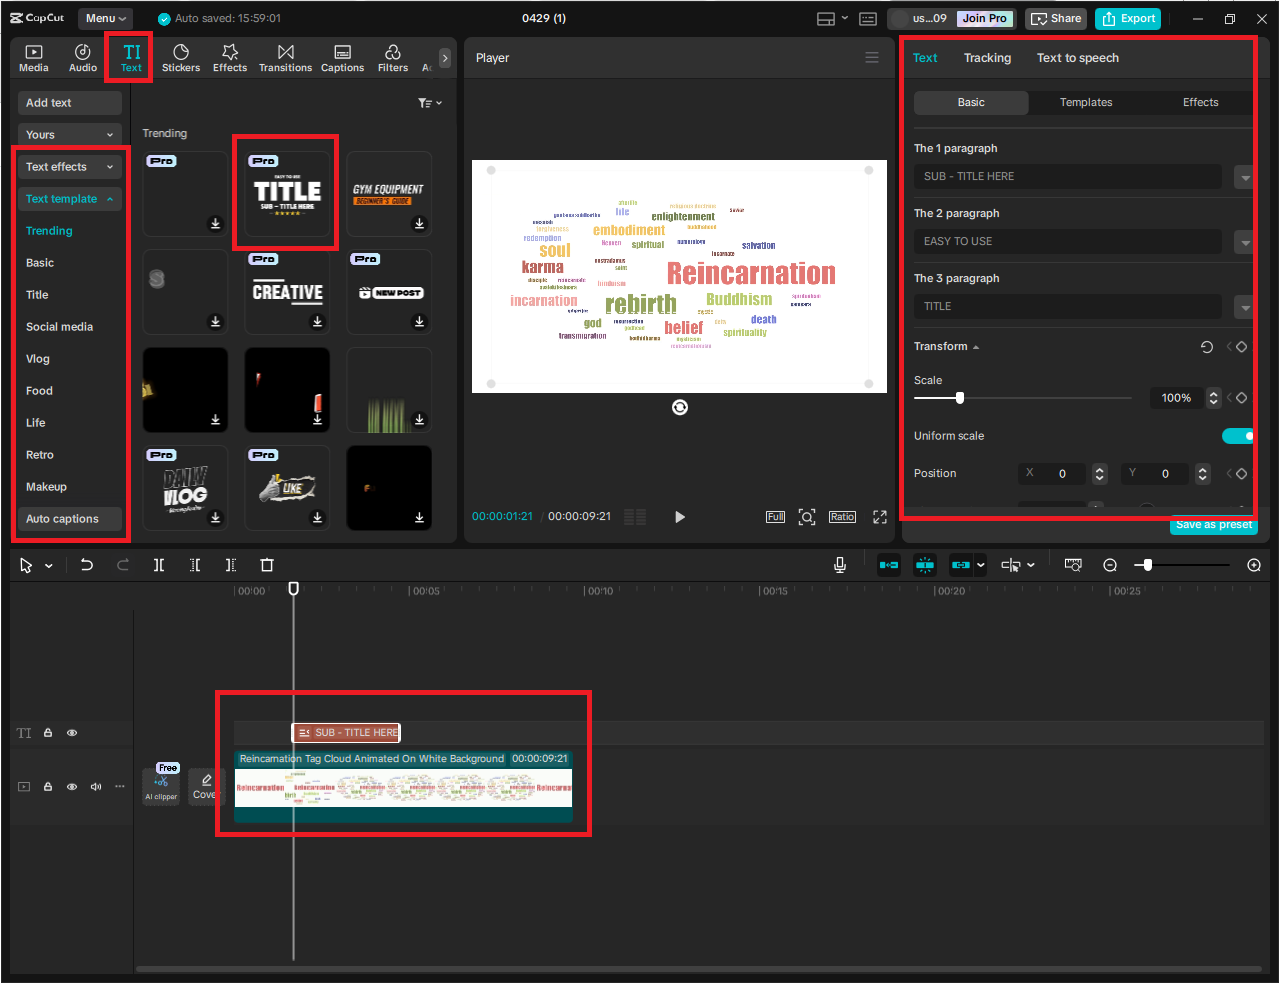
Add titles and text overlays to highlight sections like "About Me," "Skills," or "Projects." CapCut offers dozens of stylish text templates you can personalize. Just stick to simple, readable fonts and keep the text brief. If you have images of your work, such as design samples, code snippets, writing, or event photos, include them and place them appropriately on the timeline to keep the video visually dynamic.
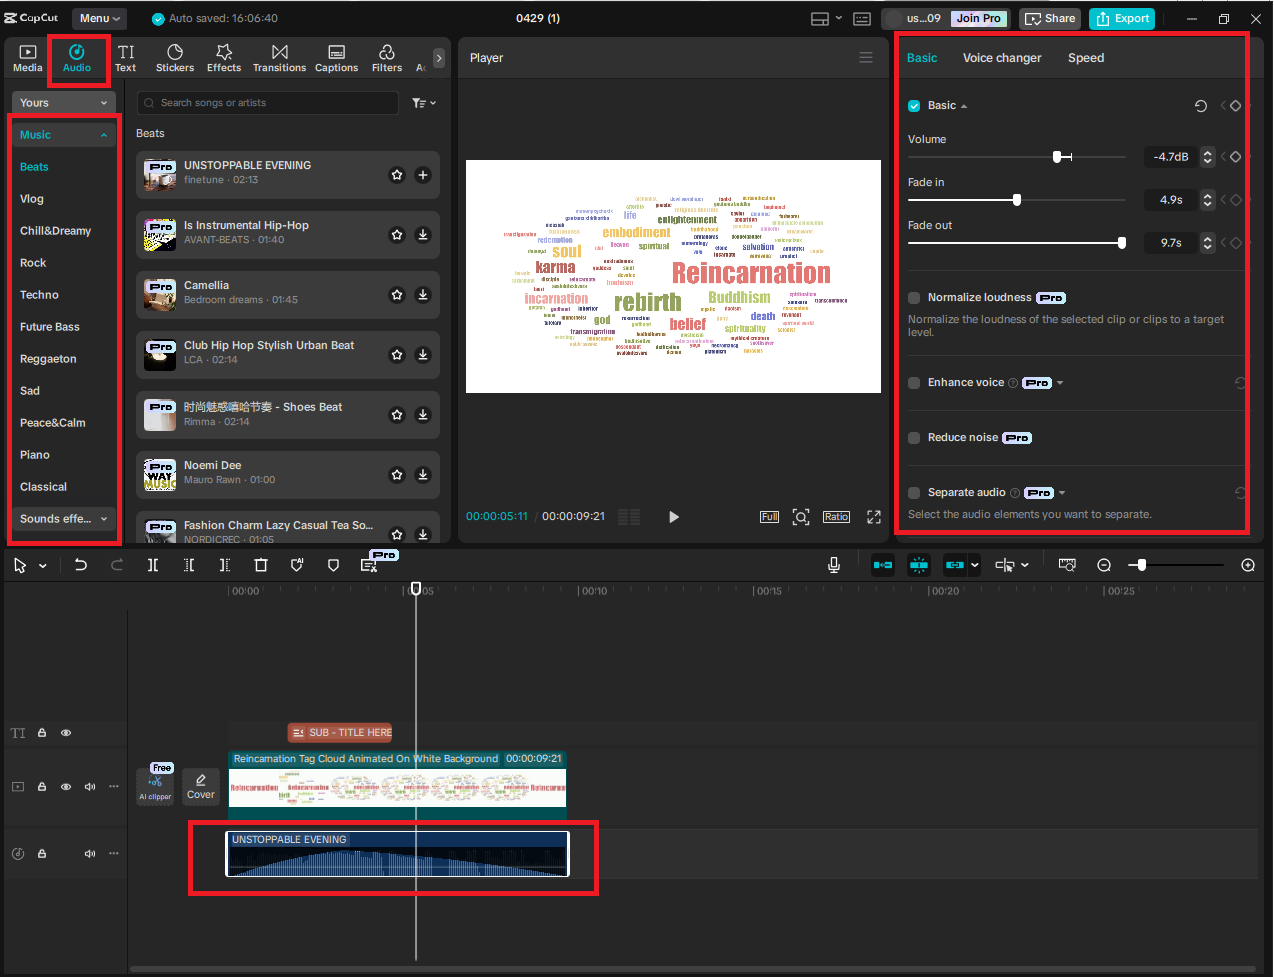
You can also add background music if desired. CapCut’s in-app audio library includes royalty-free tracks; choose a gentle, colorful tune that complements your voice without overpowering it, and reduce the volume to 10–20%. To ensure smooth scene changes, avoid abrupt cuts by using transitions like "Fade," "Slide," or "Dissolve" for a more natural and professional flow.
Finally, insert your contact information at the end of the video. Add a closing frame with your name, email, LinkedIn profile, or website link using a title card or a custom design that matches your personal style.
Step 5: Exporting and Sharing
Once everything is ready to go, it's time to export your video and let it out into the world. Click the "Export" button on the top right-hand side. Change your resolution to 1080p for higher video quality. Choose a file name and save location. Adjust bitrate if necessary (higher = better quality, but bigger file). Click "Export" and let the process of rendering finish.
Your video is now ready to be posted to job boards, added to emails, or shown on professional sites like LinkedIn. Other video resume tips to make it effective: keep it less than 2 minutes. Interviewers don't have a lot of time—show respect.
Final Thoughts
Making a professional video resume using CapCut Desktop Editor is simpler than you imagine. With some planning and a bit of creativity, you can create a memorable video that takes your job search to new levels and makes you stand out from the pack. In an industry where first impressions matter more than ever, a professionally produced video resume does more than make you noticed—it makes you remember. So go for it—open up CapCut, record, and make that next big career move. That next job could be one play button away.

.png)
%20(1).png)
%20(1).png)
.svg)

